Business Card

Thursday, April 27, 2023

Creative Card-iology Team April Retiring Favorites Blog Hop


Welcome to the Creative Card-iology Monthly Blog Hop

This month's theme is to make a card or project using 
any of the retiring products from the 
2022-2023 Annual Catalog or the
2023 January-April Mini Catalog.

With both the Annual Catalog and Mini Catalog retiring on May 1, 2023
make sure you take advantage of this sale with
discounts on some items up to 60% 
WHILE SUPPLIES LAST!

There are so many wonderful Stamp Sets, Dies and Paper
on sale and it was hard to pick from the Last Chance list.
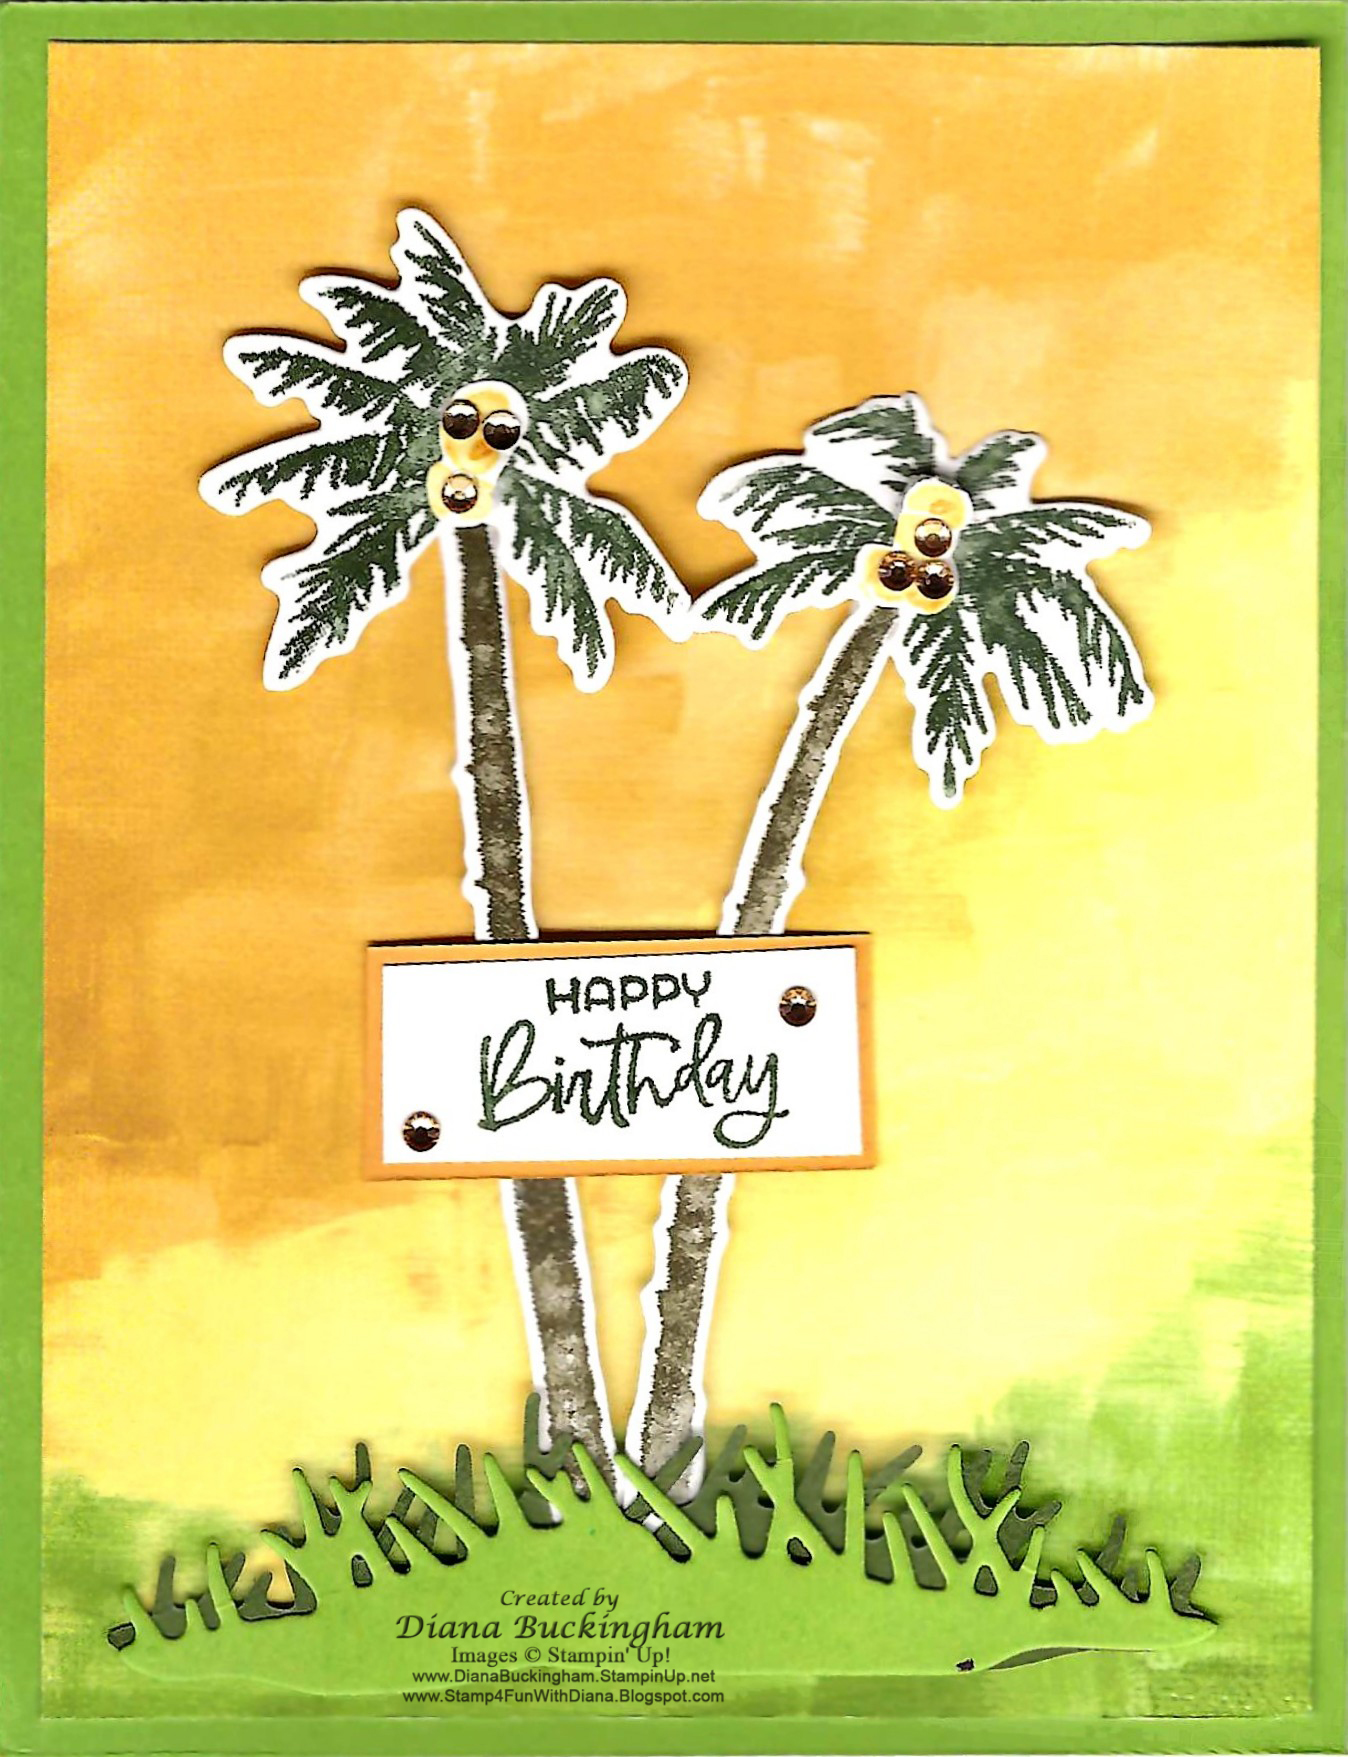
I chose Paradise Palm Stamp Set and Dies as a Thank You 
to all the wonderful stampers and friends
in the sunshine state full of PALM TREES!


 HERE ARE THE SUPPLIES USED TO MAKE THIS CARD

  • Paradise Palms Stamp Set #157716 Retiring
  • Paradise Palms Dies # Retiring
  • Cranny Apple Green Cardstock (CS) #146990
  • Basic White (CS) #159276
  • Mossy Meadow CS #133676
  • Mango Melody CS #146989 Retiring
  • Mango Melody Stampin' Write Marker Retiring
  • Soft Suede Stampin' Write Marker Retiring
  • Mossy Meadow Stampin" Pad #147111
  • Soft Suede Stampin' Pad #147115 Retiring
  • Hues of Happiness 12" x 12" Designer Series Paper (DSP) #158822 Retiring
  • Paper Trimmer #152392
  • Bone Folder #102300
  • Take Your Pick Tool #144107
  • Champagne Rhinestone Basic Jewels #151193
  • Stampin' Cut and Emboss Machine  #149653
  • Silicone Craft Sheet #127853
  • Stampin' Seal #152813
  • Dimensionals #104430


HERE ARE THE INSTRUCTIONS I USED TO MAKE THIS PROJECT 
In this tutorial the name Seal is referring to the use of the Stampin' Seal Adhesive.
  • Cut a piece of Granny Apple Green " x 5½" (Score at 4¼")
  • Cut a piece of Mango Melody " x 5½" (Score at 4¼")
  • Fold both pieces, then add adhesive on one side of the Mango Melody piece and adhere to one side of the Granny Apple Green. You should now have 3 panels.  Lay then so there are two Mango Melody panels and one Granny Apple Green panel. These are the three panels you will add a layer to.

  • First layer - Cut 5¼" x 4" piece of DSP
  • On a piece of Basic White scrap, stamp and die cut the following:
    both trees using Soft Suede
    both trees branches using Mossy Meadow
    stamp 2 tree buds using Mango Melody
  • Using Mossy Meadow and Granny Apple Green CS, die cut both with the grass die
  • Add dimensionals to the back of these 8 pieces and assemble as shown

  • Second Layer - Cut a piece of DSP 5¼" x 4", a piece of Mango Melody 3¼" x 4½" and a piece of Basic White 3⅛" x 4⅜".  Stamp the greeting in the lower Right corner using Soft Suede Ink. Stamp the two Tree Trunks using Soft Suede making sure you have enough room for the branches then stamp the branches using Mossy Meadow ink.  Add adhesive to the back of the Basic White piece and adhere to the Mango Melody piece

  • Third Layer - Cut Basic White 5¼" x 4".  On the left lower corner stamp the mound using the Soft Suede ink, then stamp the three trees using the Soft Suede and Mossy Meadow Stampin' Write Markers as shown

  • Adhere using the Seal Adhesive or Tombow Liquid Glue to adhere each of the Layers.
  • Mountain Fold and Valley fold so layer one will be on the front of the card.
  • To put the final touches on the card add Champagne Rhinestone to the front of the card.

Please feel free to leave me a comment and thanks for hopping by.
Click on the names below to visit our other team member's blogs and
see what amazing cards or projects they have created to inspire you!
 
Kim Thompson
Diana Buckingham (You are here)
 
Contact me with any questions!


Thursday, March 23, 2023

Creative Card-iology Team March Irresistible Blooms/Online Exclusives Blog Hop

Welcome to the Creative Card-iology Monthly Blog Hop

This month's theme is to make a card or project using 
any of our ONLINE EXCLUSIVE products
                   
For this Blog Hop I choose Irresistible Blooms
 
Here is the Center Step Fun Fold Card I made

 HERE ARE THE SUPPLIES USED TO MAKE THIS CARD

  • Irresistible Blooms Stamp Set #1161140
  • Irresistible Blooms Dies #1161149
  • Loose Frosted Dots #161153
  • Basic White Cardstock (CS) #159276
  • Flirty Flamingo CS #141416
  • Soft Succulent CS #155776
  • Memento Black Ink Pad #132708
  • Evening Evergreen Stampin' Pad #155576
  • Soft Succulent Stampin' Pad #155778
  • Paper Trimmer #152392
  • Bone Folder #102300
  • Take Your Pick Tool #144107
  • Stampin' Cut and Emboss Machine  #149653
  • Silicone Craft Sheet #127853
  • Multipurpose Liquid Glue #110755
  • Stampin' Seal #152813
  • Multipurpose Liquid Glue #110705
  • Dimensionals #104430
  • Mini Glue Dots #103683
  • Whisper White ¼” Organza Ribbon

HERE ARE THE INSTRUCTIONS I USED TO MAKE THIS PROJECT 
In this tutorial the name Seal is referring to the use of the Stampin' Seal Adhesive.
  • Cut a piece of Basic White 11" x 4¼”
  • Cut a slit from 2" to 6½" along the 11" side, turn over and repeat on the back side.
  • Using the picture below, score as directed on the 1", 2", 5½" and 6½
  • Fold ONLY the score lines as follows - 1" Mountain Fold, 2" Valley Fold, 5½" Mountain Fold and 6½" Mountain Fold.
  • Cut 2 pieces of Flirty Flamingo 4½" x 1".
  • Cut 2 pieces of Basic White 6½" x 1½" and using the long Irresistible Blooms die, run them thru the Stampin' Cut and Emboss Machine.
  • Carefully add Stampin' Seal lightly to the back of the 2 die pieces and holding the ends, center and lay over the Flirty Flamingo CS.
  • Use you finger and slide over the die piece to remove any remaining adhesive.
  • Trim the excess piece off both ends.
  • Adhere the 2 pieces between the valley and mountain folds along each side.
  • Cut a piece of Flirty Flamingo 4" x ¾".
  • Cut a 5" piece of ribbon and seal the end pieces on the back.
  • The tiny bow was made using a fork. Add a glue dot and add over the wrapped ribbon then adhere across the bottom of the card.
  • Using Memento Black Ink and Basic White CS, stamp and die cut the 2 flowers.
  • Color the flowers with the Dark Flirty Flamingo Stampin' Blends.
  • Color the flower centers with the Dark Mango Melody.
  • Using Soft Succulent Ink and Soft Succulent CS, stamp and die cut the leaf pieces.
  • Add a dimensional to the back of each flower and adhere to the center piece.
  • Add a dimensional to the from edge of the leaves and tuck under the flowers.
  • Using Evening Evergreen Ink, stamp your greeting near the top of the card.
  • To add the final touches I used the Loose Frosted Dots on the center of the flowers in addition to the normal 3 on the front.  This was a little tricky because there is no adhesive on the back of the dots so I put a drop of multipurpose liquid glue on my Silicone Craft Sheet then used a tooth pick to apply glue. Now enjoy your finished card!


    Please feel free to leave me a comment and thanks for hopping by.
    Click on the names below to visit our other team member's blogs and
    see what amazing cards or projects they have created to inspire you!
     

    Diana Buckingham (You are here)
    .
    Contact me with any questions!

Thursday, February 23, 2023

Creative Card-iology Team February Sale A Bration Favorites Blog Hop


Welcome to the Creative Card-iology Monthly Blog Hop

This month's theme is to make another card or project using 
Sale-A-Bration rewards 
 
For every $50 or $100 you spend (before tax and shipping)you get to chose a free product from the Sale-A-Bration (SAB) brochure

For this Blog Hop I choose the following Sale-A-Bration rewards
Favored Flowers 12" x 12" Designer Series Paper (DSP) - 160833
Eden's Garden 12" x 12" DSP - 160836
 
Here is the Pinwheel Tower Fun Fold Card I made

 HERE ARE THE SUPPLIES USED TO MAKE THIS CARD

  • Eden's Garden Stamp Set #157823 SAB
  • Best Day Stamp Set #160798
  • Something Fancy Dies #160424
  • Blossoming Happiness # 158823
  • Favored Flowers 12" x 12" Designer Paper(DSP) #160833 SAB
  • Basic black CS #121045 or Calypso Coral CS #122925
  • Basic White CS #159276
  • Calypso Coral Classic Ink Pad #147101
  • Memento Black Ink Pad #132708
  • Paper Trimmer #152392
  • Bone Folder #102300
  • Take Your Pick Tool #144107
  • Stampin' Cut and Emboss Machine  #149653
  • Multipurpose Liquid Glue # 110755
  • Stampin' Seal #152813
  • Dimensionals #104430
  • A piece of wax paper about 1" x 5½"

HERE ARE THE INSTRUCTIONS I USED TO MAKE THIS PROJECT 
In this tutorial the name Seal is referring to the use of the Stampin' Seal Adhesive.
  • Cut a piece of Basic Black at 4¼” x 6¾".  On the long side, score at 1". 2", 3", and 4"
  • Cut 3 additional pieces of Basic Black at 4¼” x 2¾”
  • Cut 2 pieces of Basic White CS at 4" x 2½"
  • Cut 2 pieces of the pretty flowers from the Favored Flowers DSP 4" x 2½"
  • Cut 4 coordinating pieces from the Favored Flowers DSP 4" x 1½"
  • Cut a piece of wax paper about 1½" x 5½"
  • All of your cut pieces should now look like this with your 2 white pieces and the 2 flower pieces setting on the black CS
  • On the long Black CS piece, fold the four score marks then fold them in making a square.  Add adhesive to the 1" end piece and adhere making the square with the first pinwheel attached.  If using the liquid glue, place the wax paper in the square tube, as a precaution to protect any glue that might cause the card to get stuck and not open freely.
  • Lay the square down with the extended black pinwheel piece pointing up from the back.  Add adhesive to the side of the square facing up then adhere the 2nd  pinwheel piece.
  • Turn 90˚ and repeat the process above for the 3rd Pinwheel piece.
  • Turn 90˚ and repeat the process above for the 4th Pinwheel piece.
  • Die cut the Basic White CS 4" x 2½” using the decorative die from the Blooming Happiness Die.
  • Die cut a Basic Black scrap piece using the rectangle die from the Something Fancy Dies.
  • Stamp a small greeting on Basic White CS and Fuzzy trim to adhere to the die cut Black rectangle, add Dimensionals and adhere to the White embossed piece. 
  • On the other Basic White CS 4" x 2½” add your greeting and salutation.
  • Now to decorate the 4 black pinwheels.
  • Adhere the White Embossed piece to one of the black pinwheels and the coordinating piece on the left side.
  • On the next pinwheel, adhere one of the large Flowers pieces and the coordinating piece on the left side.
  • On the next pinwheel, adhere your stamped greeting signature piece and the coordinating piece on the left side.

  • On the last pinwheel, adhere the other large Flowers piece and the coordinating piece on the left side.
  • This card will lay flat so it will fit in an envelope.

Please feel free to leave me a comment and thanks for hopping by. 

Click on the names below to visit our other team member's blogs 
and see what amazing cards or projects they have created to inspire you!
Diana Buckingham (You are here)

.
Contact me with any questions!